

This Easy Gluten-Free Pie Crust uses just a few simple ingredients and a handful of steps. Crisp and golden brown, it’s better than anything you’ll find in the store and can be used to make all your favorite homemade pies!

the Best Gluten-Free Pie Crust
If you’ve ever tried to make a gluten-free pie crust from scratch, you already know it’s not exactly the easiest task. And, unfortunately, most store-bought options don’t exactly taste the best.
So, in order to craft the absolutely perfect pie crust for you, we’ve tested and retested this recipe about a thousand times. Turns out, the secret is all in the ingredients (and amounts) used!
Rest assured, this homemade gluten-free pie crust recipe is simple to prepare with minimal prep time, has a rich, buttery flavor, and bakes to golden perfection every time. It’s even nut-free and dairy-free-friendly, too!
Gluten-Free Pie Crust Ingredients
Like traditional recipes, this gluten-free version uses just a handful of baking staples.
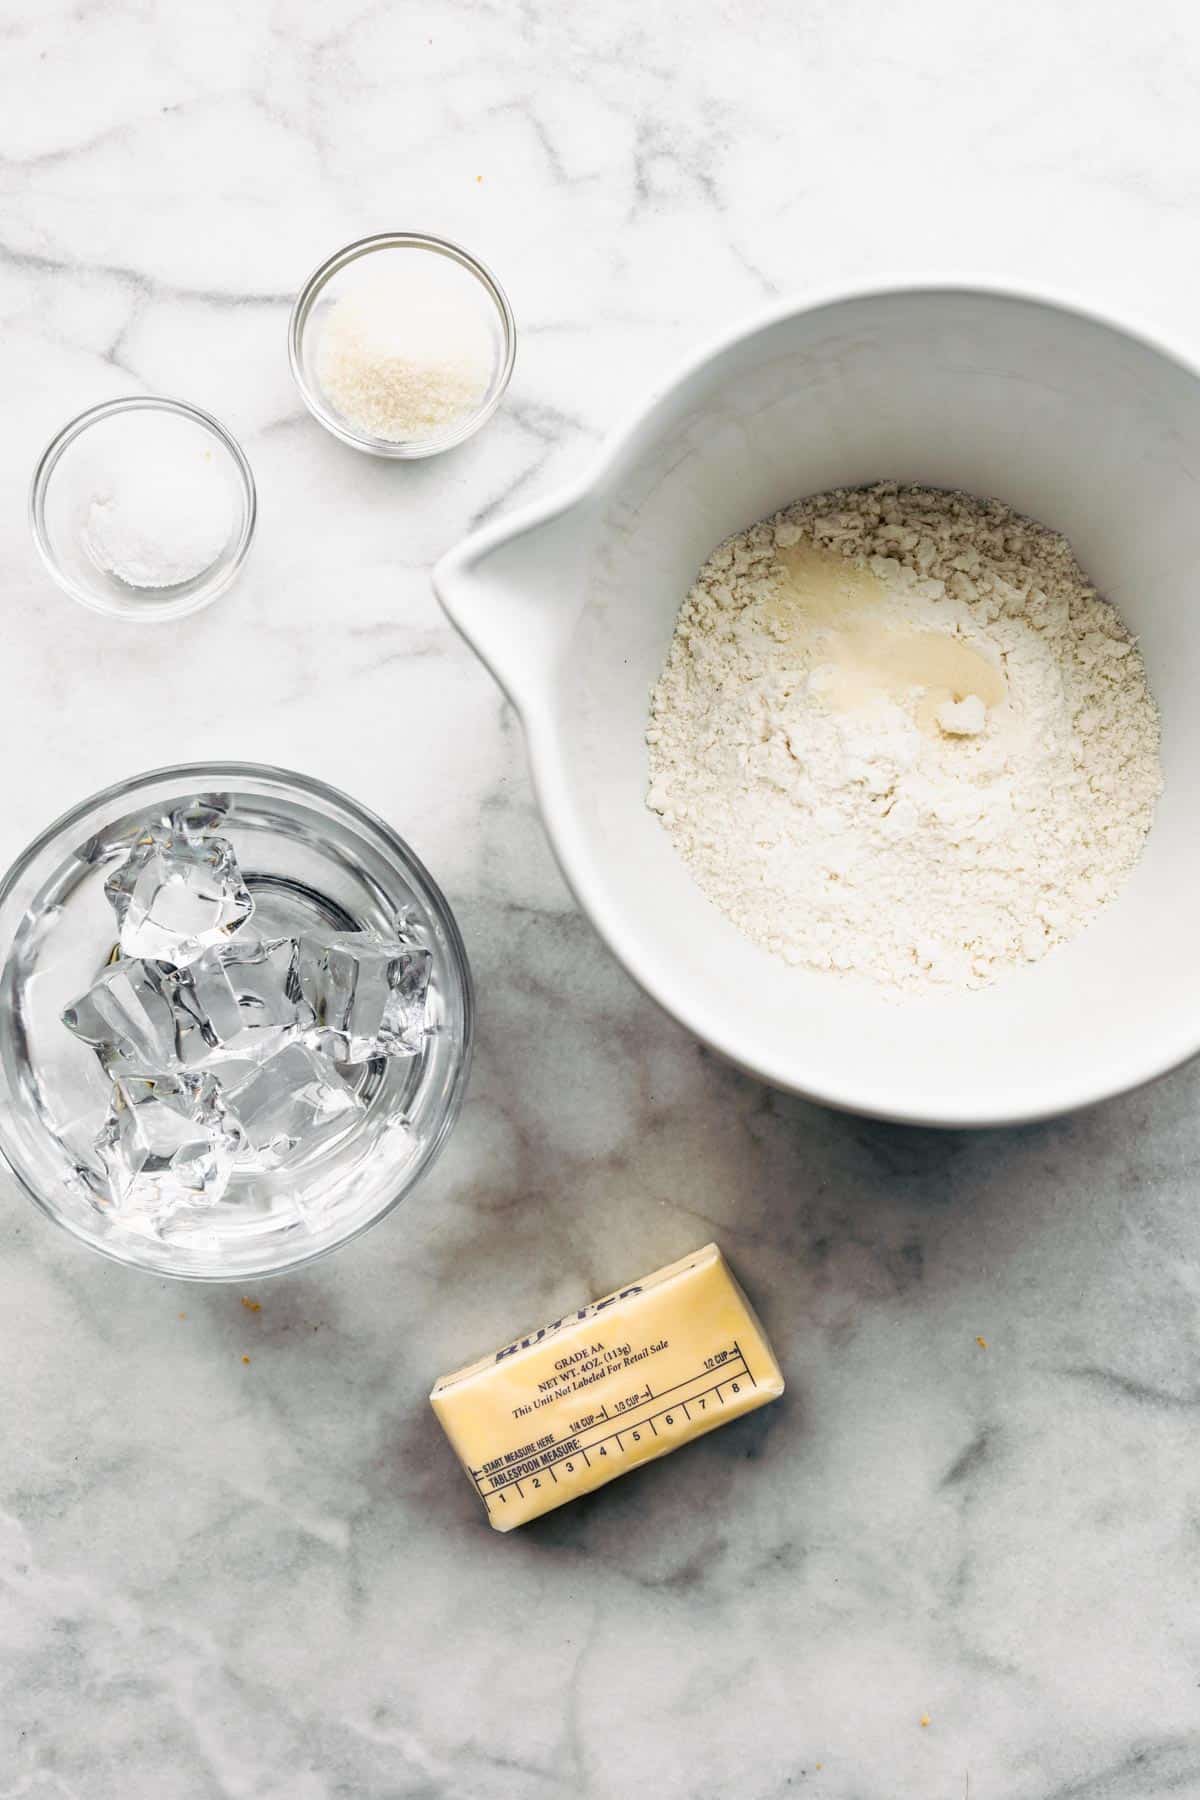
- Gluten-Free All-Purpose Flour – If preferred, use a homemade all-purpose gluten-free flour blend. Just make sure it doesn’t contain any xanthan gum!
- Xanthan Gum – This helps hold the crust together and contributes to the flaky texture.
- Butter – Use partially frozen or very cold butter. If needed, opt for a soy-free, vegan butter such as Myoko’s or Earth Balance to make this recipe dairy-free.
- Sugar – Regular granulated sugar adds just a touch of sweetness.
- Salt – This helps enhance the flavor of the rest of the ingredients.
- Ice Water – Adjust the amount as needed. Just make sure it’s ice cold!
Tip: Using both cold water and cold butter is key to creating a bakery-worthy flakey crust.
Baking Tips
- Gluten-Free Flour Tips – Each brand of gluten-free all-purpose flour will measure slightly differently by weight. We recommend using between 30 and 34 grams per ¼ cup. Also, if your gluten-free flour has xanthan gum already included, omit the extra xanthan gum in the recipe. The texture won’t be as flaky, but it should work just fine!
- Food Processor Alternative – If you don’t have a food processor, mix the gluten-free flour, salt, and xanthan gum in a large bowl. Then, use a cheese grater to grate the butter into the flour. Use a fork or pastry cutter to combine the ingredients until they’re crumbly.
- Avoid Overworking the Dough – Be careful to combine the ingredients just until a smooth dough is formed. Continuing to mix will melt the butter and overwork the dough, causing it to become tough and dense once baked.
- Use a Glass or Metal Plate – In general, we recommend using glass or metal pie pans for baking as they help distribute the heat more evenly, creating a beautiful golden color and rich, buttery taste!
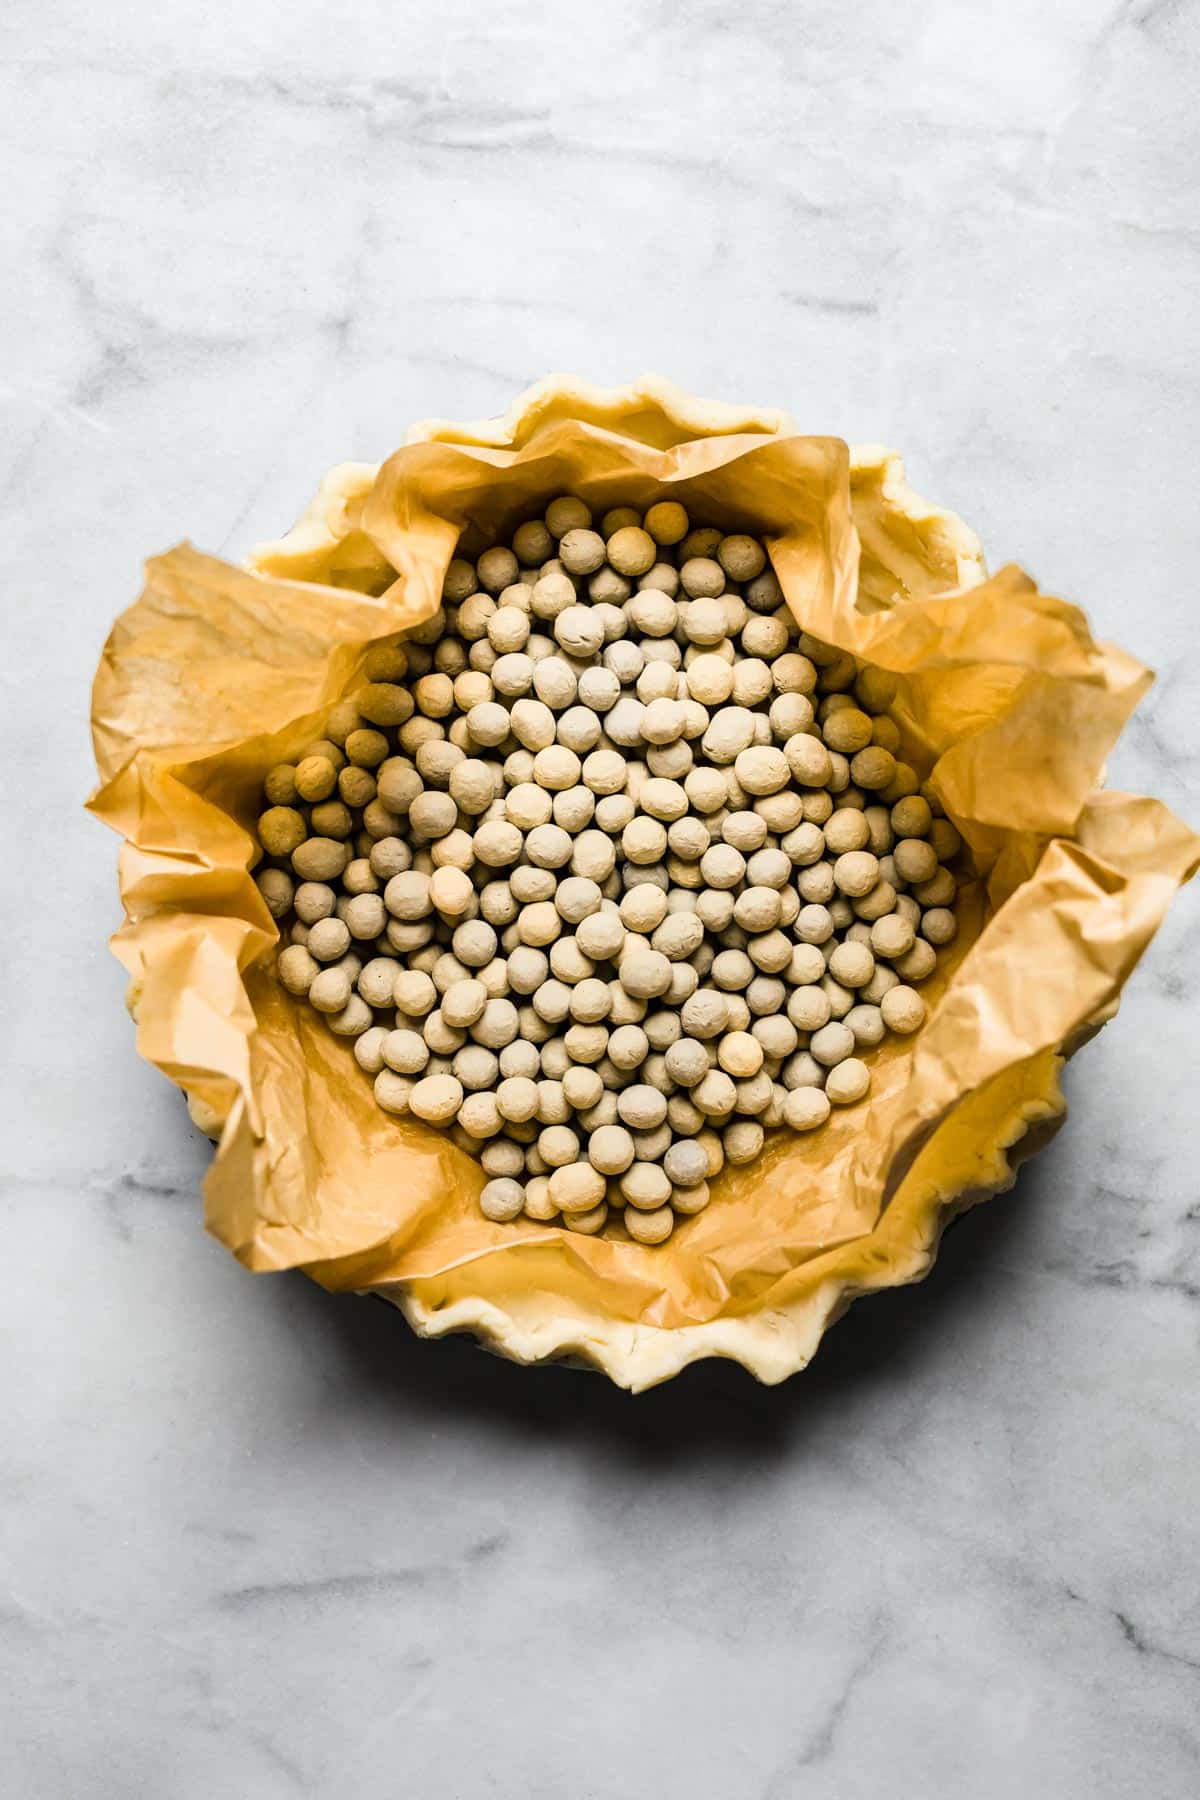
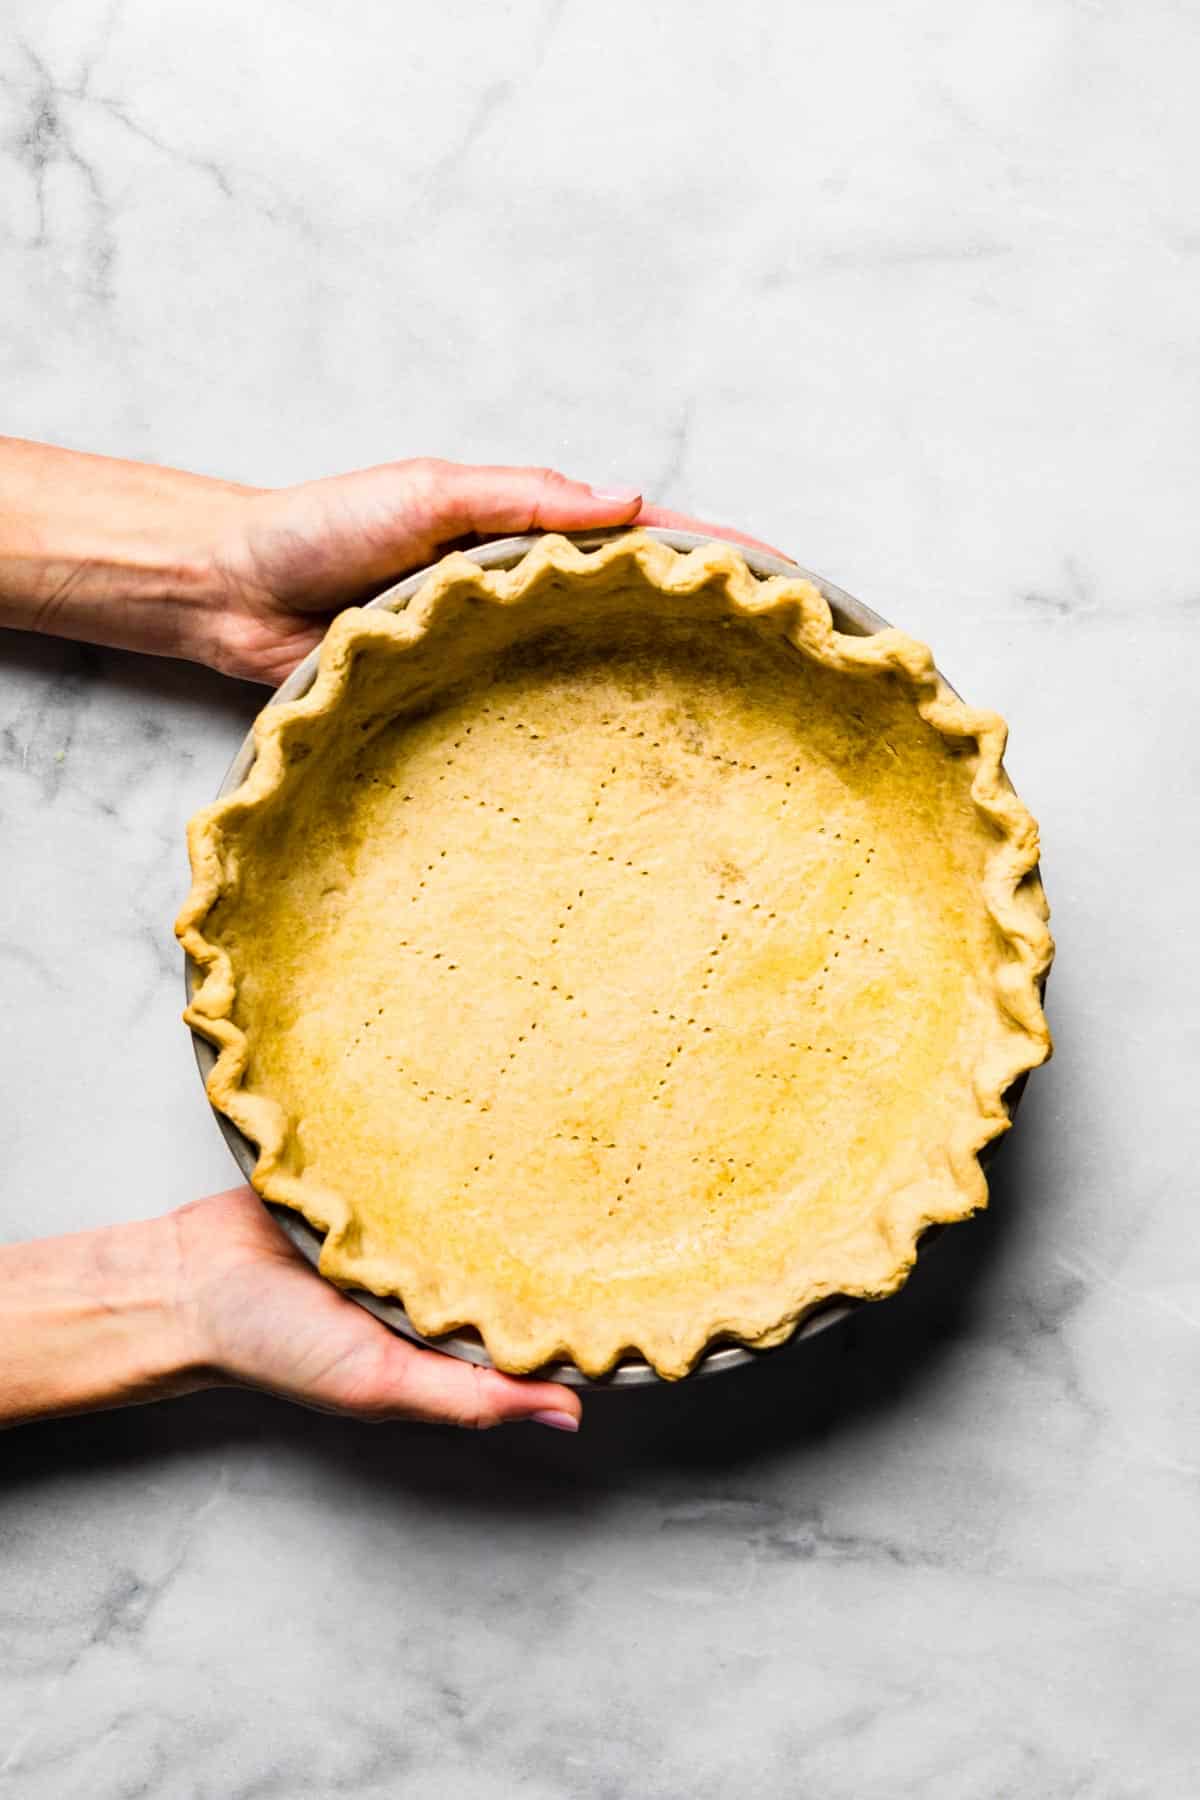
- Blind-Bake – We recommend blind baking when the pie filling doesn’t need to be baked. To do so, freeze the crust in the pan. Then, bake it covered with parchment paper, and fill the pie plate with pie weights or beans. Whisk together an egg and an egg yolk with water or milk. Once baked, prick the bottom of the pie with a fork (don’t pierce all the way through!), brush the base and sides with the egg wash, and return the pie to the oven until golden brown. Let it cool completely before adding the filling.
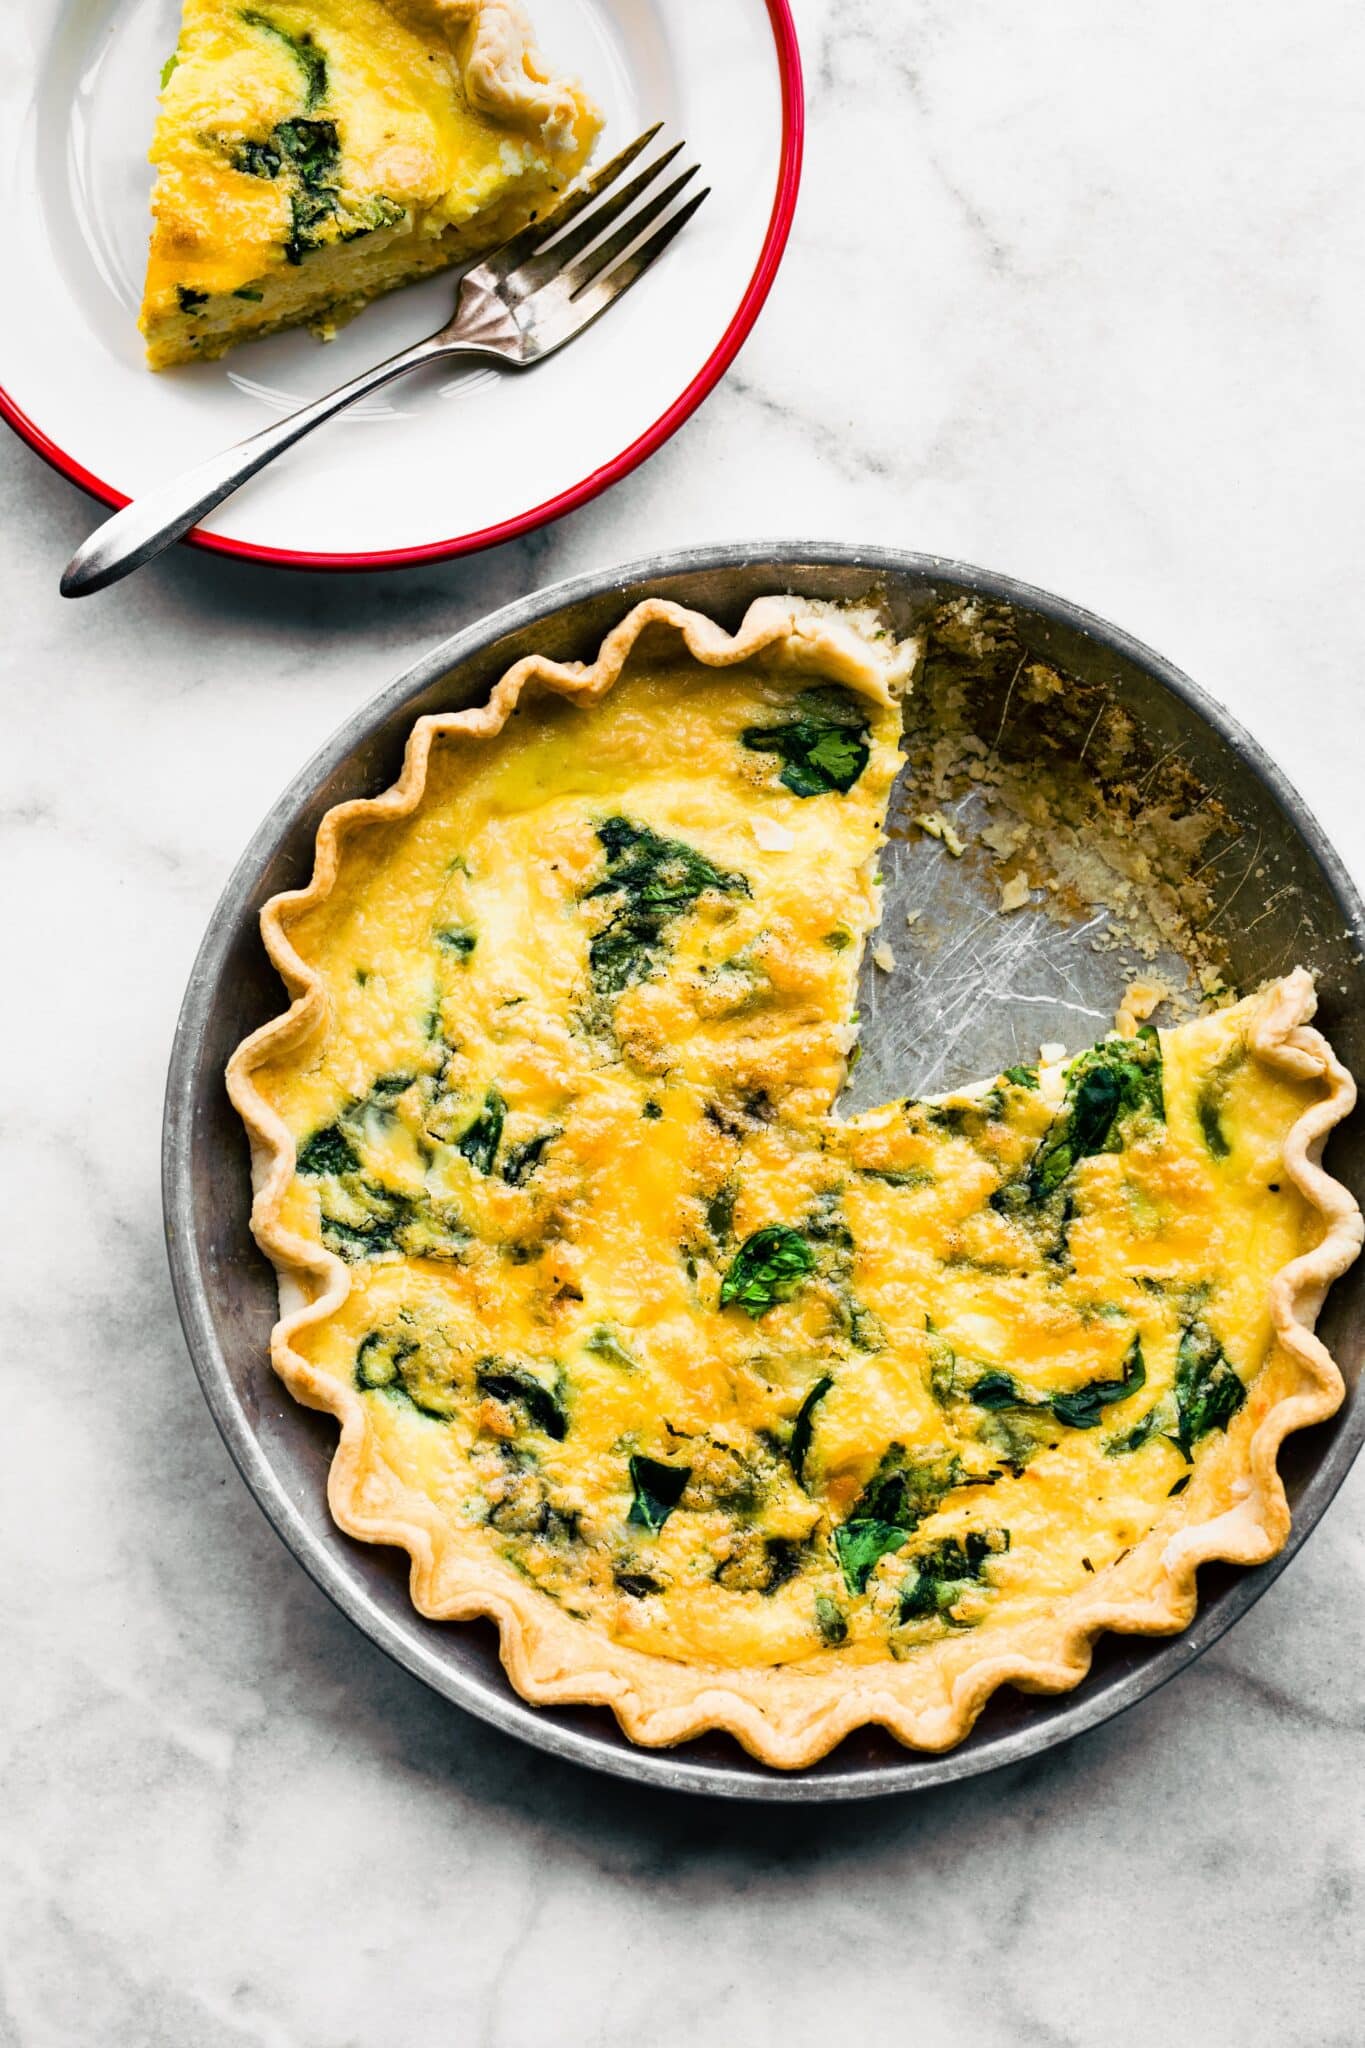
- Par-Bake – This method is best for custard-like pies such as pumpkin pie and quiches. To par-bake, cover the crust with a piece of parchment paper, and weigh it down with pie weights. Bake for about ten minutes, and prick the bottom lightly with a fork. Then, brush the sides and base with an egg wash, and bake until the bottom is golden brown but not completely cooked.
- Cover Your Pie – When you’re ready to bake, cover the sides of the crust with aluminum foil or a pie shield halfway through baking to prevent it from burning.
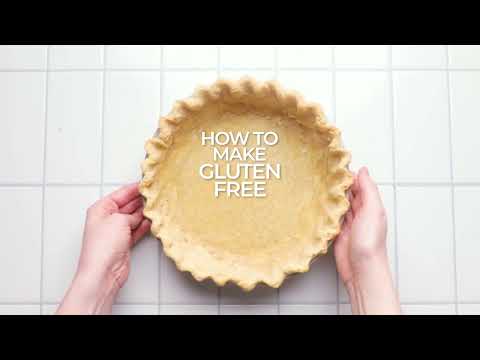
Hot to Make Gluten-Free Pie Crust
Below is an overview of the recipe instructions. Be sure to scroll down to the recipe card below for the complete details!
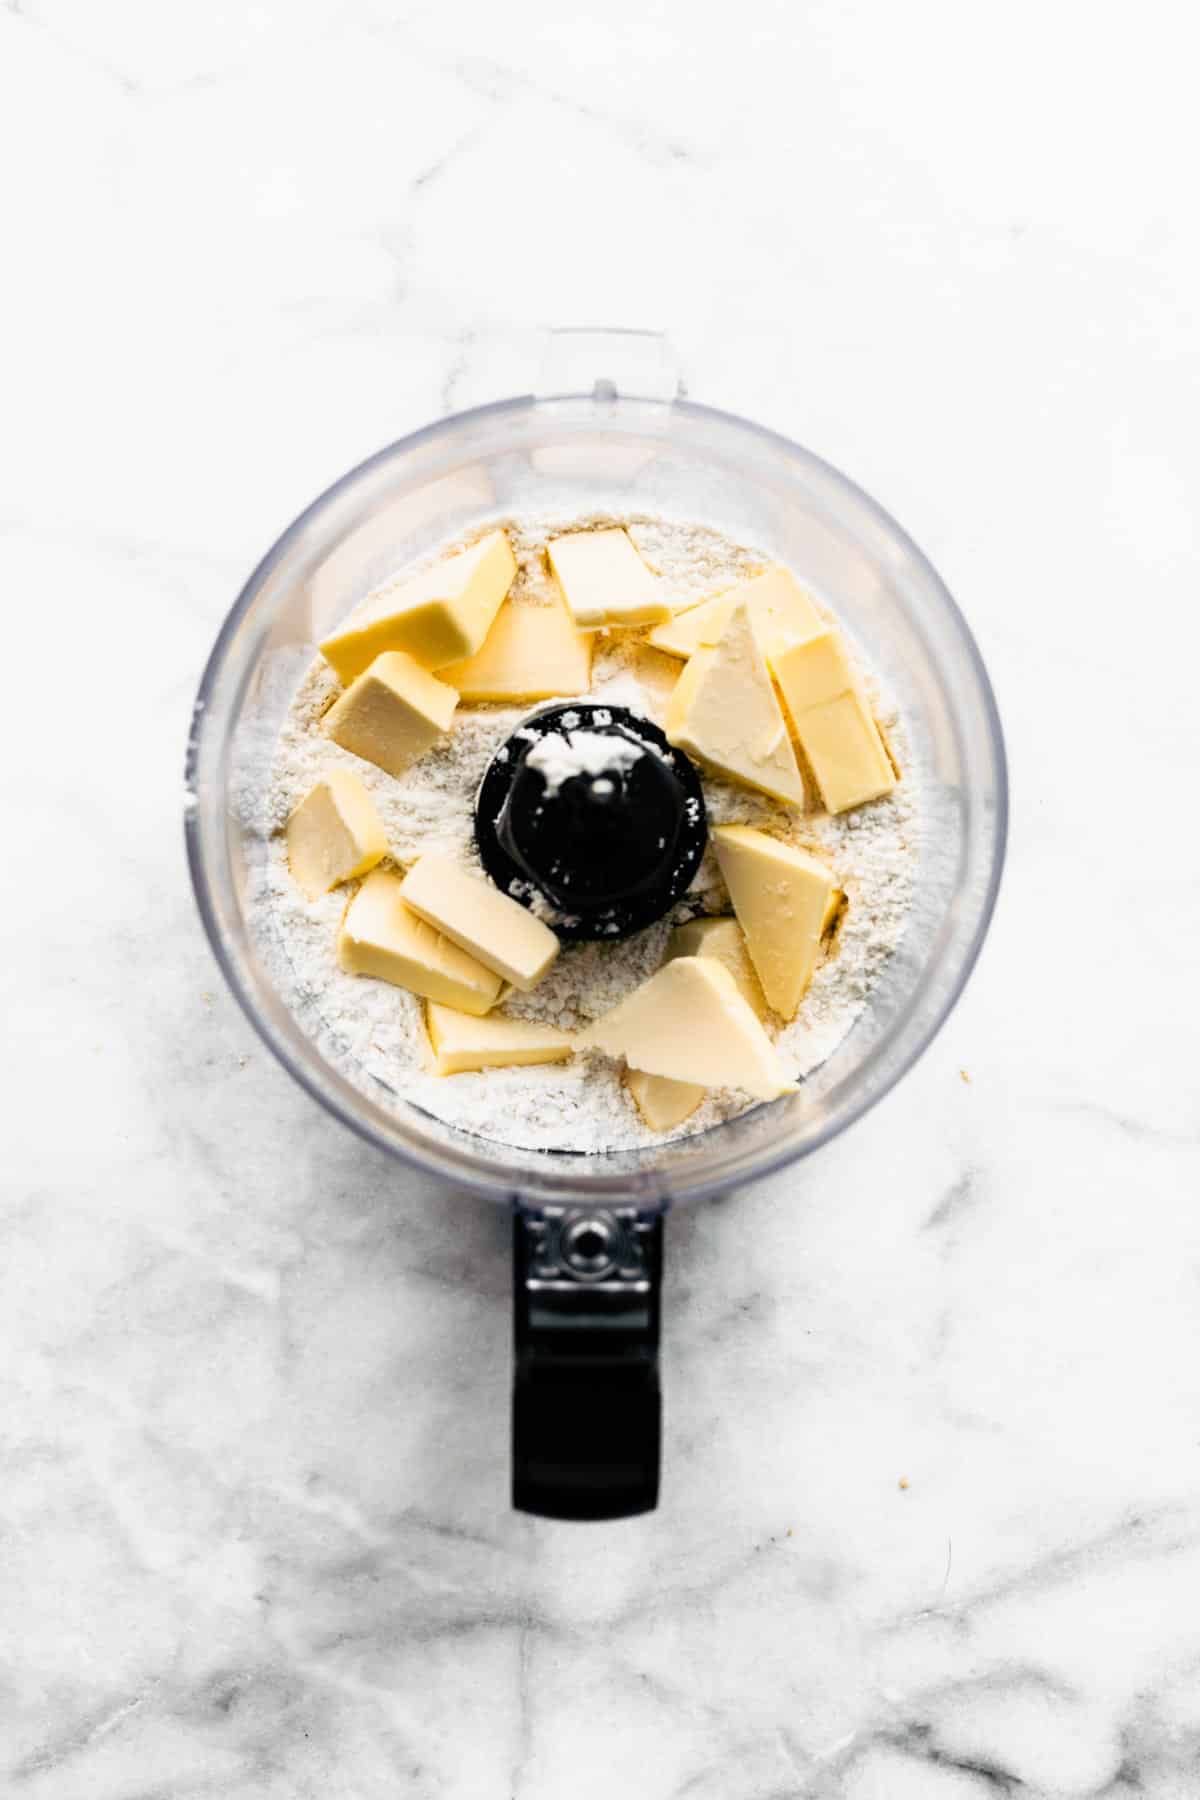
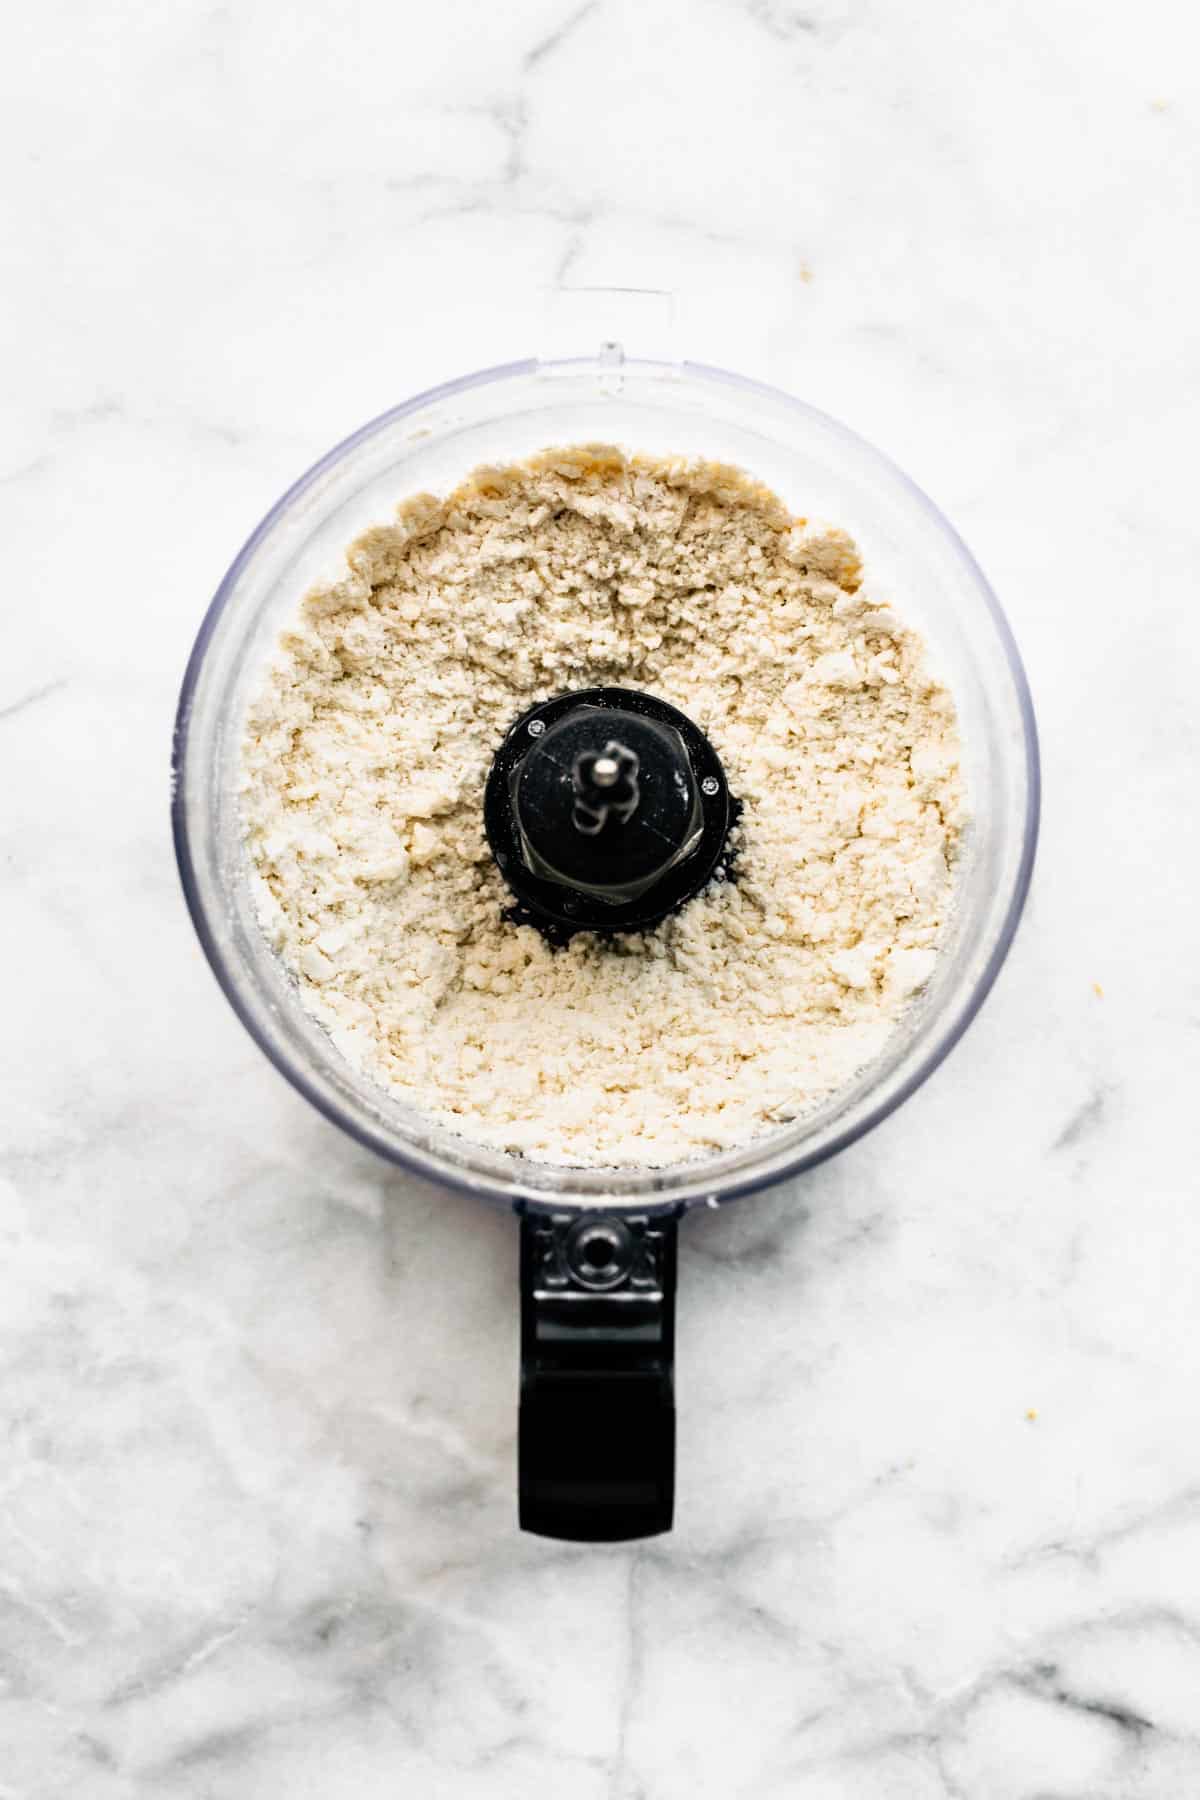
- Pulse. Add part of the flour to the bowl of a food processor, and sprinkle the frozen butter cubes on top. Cover with the remaining flour, sugar, and salt. Then, pulse the mixture in short bouts until it is combined and broken into small chunks.
- Mix. Drizzle in the ice water, and pulse for longer periods until the mixture is light yellow in color and crumbly. Scrape down the sides, and pulse a couple more times. Add more ice water as needed if the dough is too dry to shape into a ball.
Note: Be careful not to add too much water, or your dough will become soggy. You shouldn’t need more than one or two extra tablespoons in a standard. However, super dry climates may require up to 8 tablespoons of water in total.
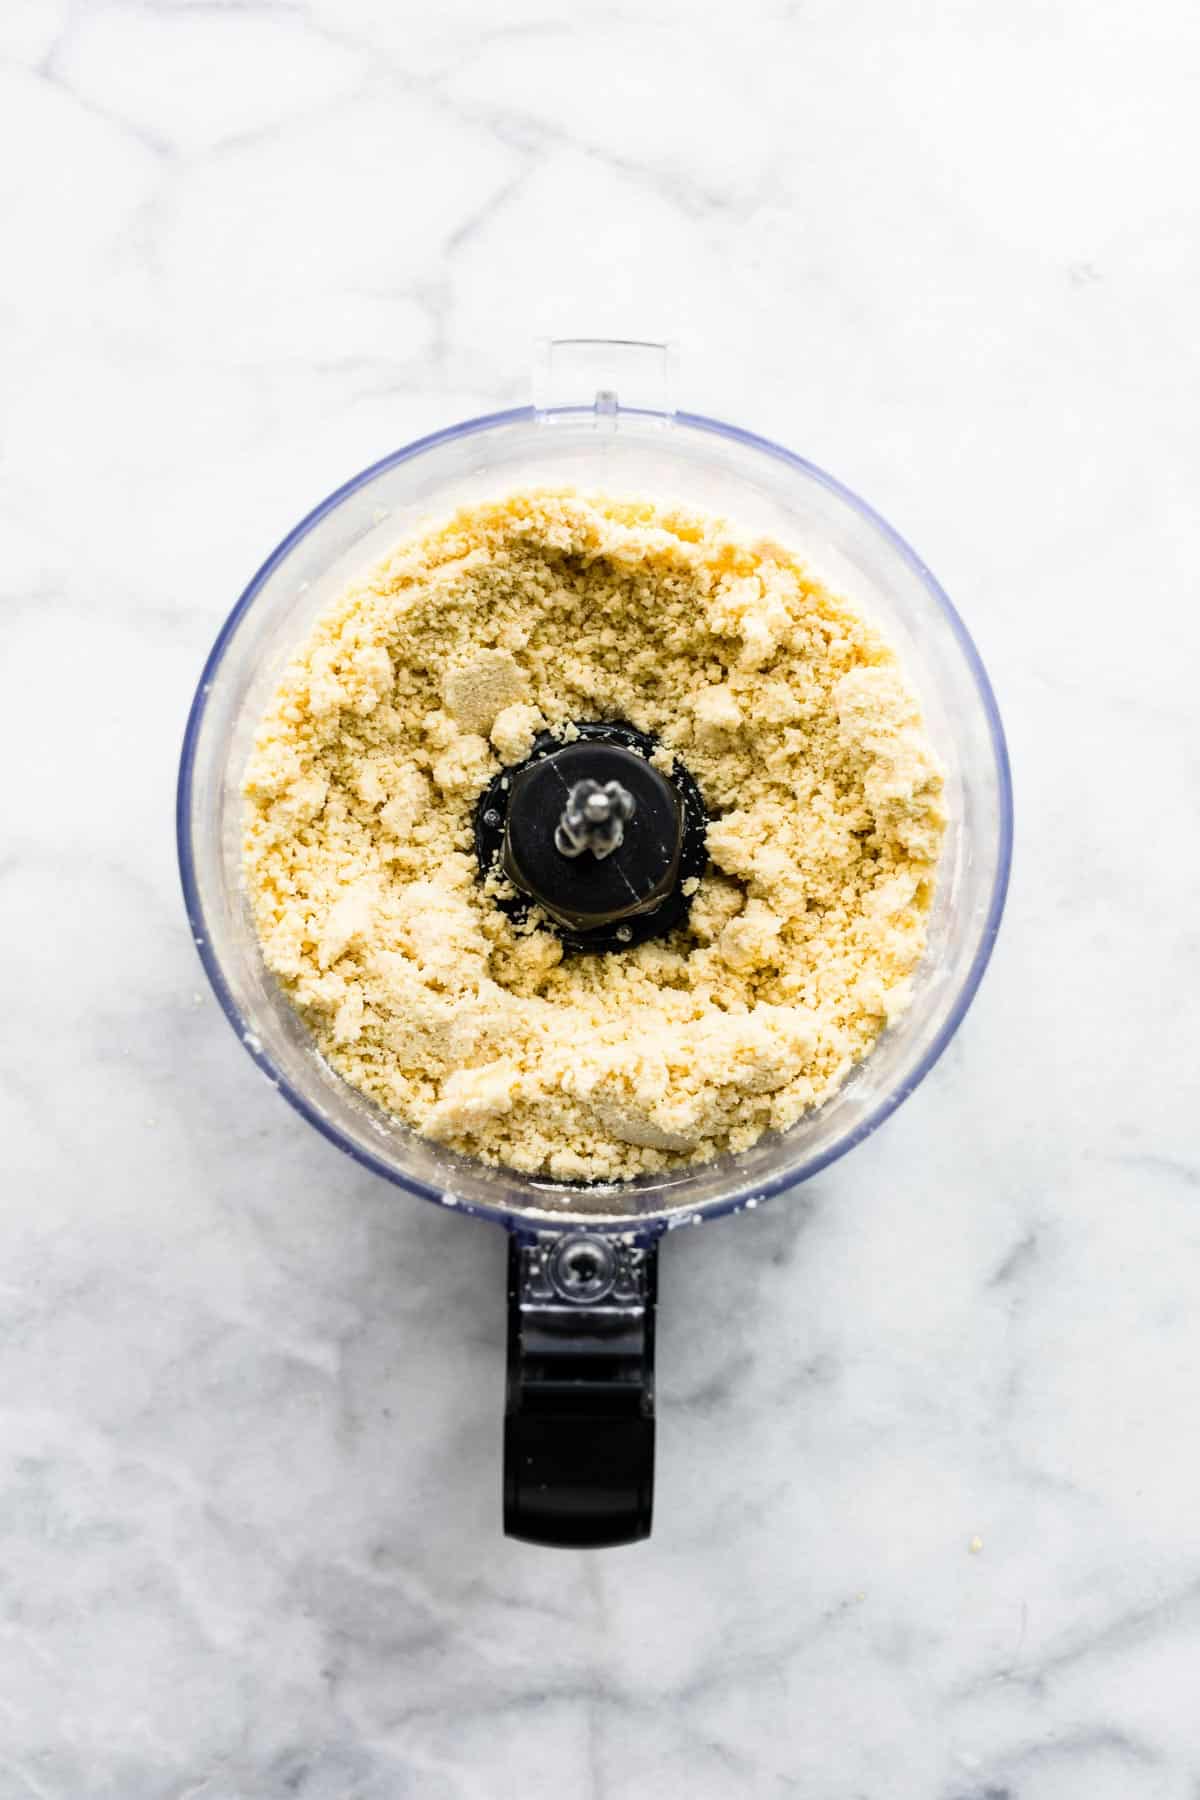
Note: Be careful not to overwork the batter! It should be mealy with bits of butter still visible.
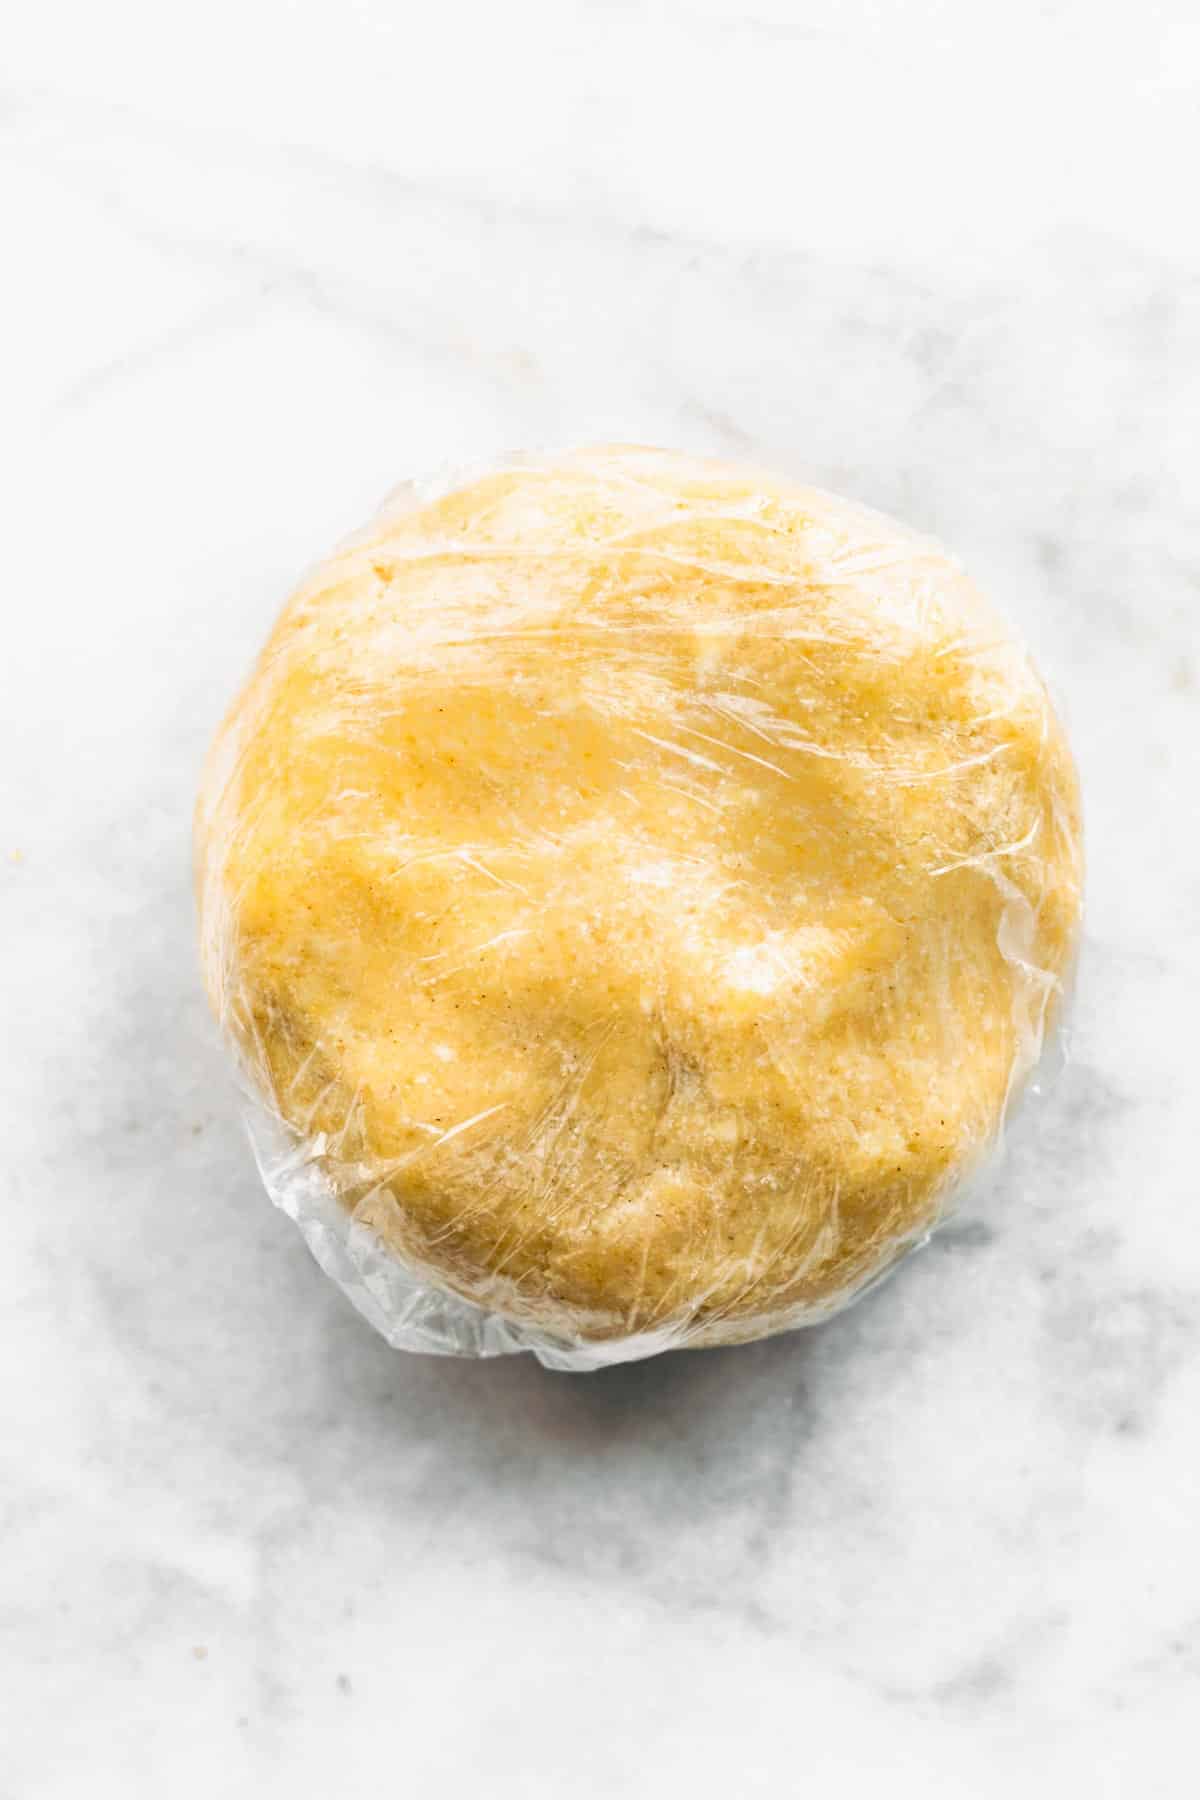
- Chill. Transfer the dough to a large bowl or a work surface, and shape it into a ball. Flatten it slightly into a disc, and wrap it tightly with plastic wrap before transferring it to the refrigerator to chill.
- Roll. Allow the dough to come to room temperature. Then, lightly flour a work surface and a rolling pin. Or, roll the dough between two pieces of plastic wrap until it is roughly ¼ to ⅛ inch thick all the way across.
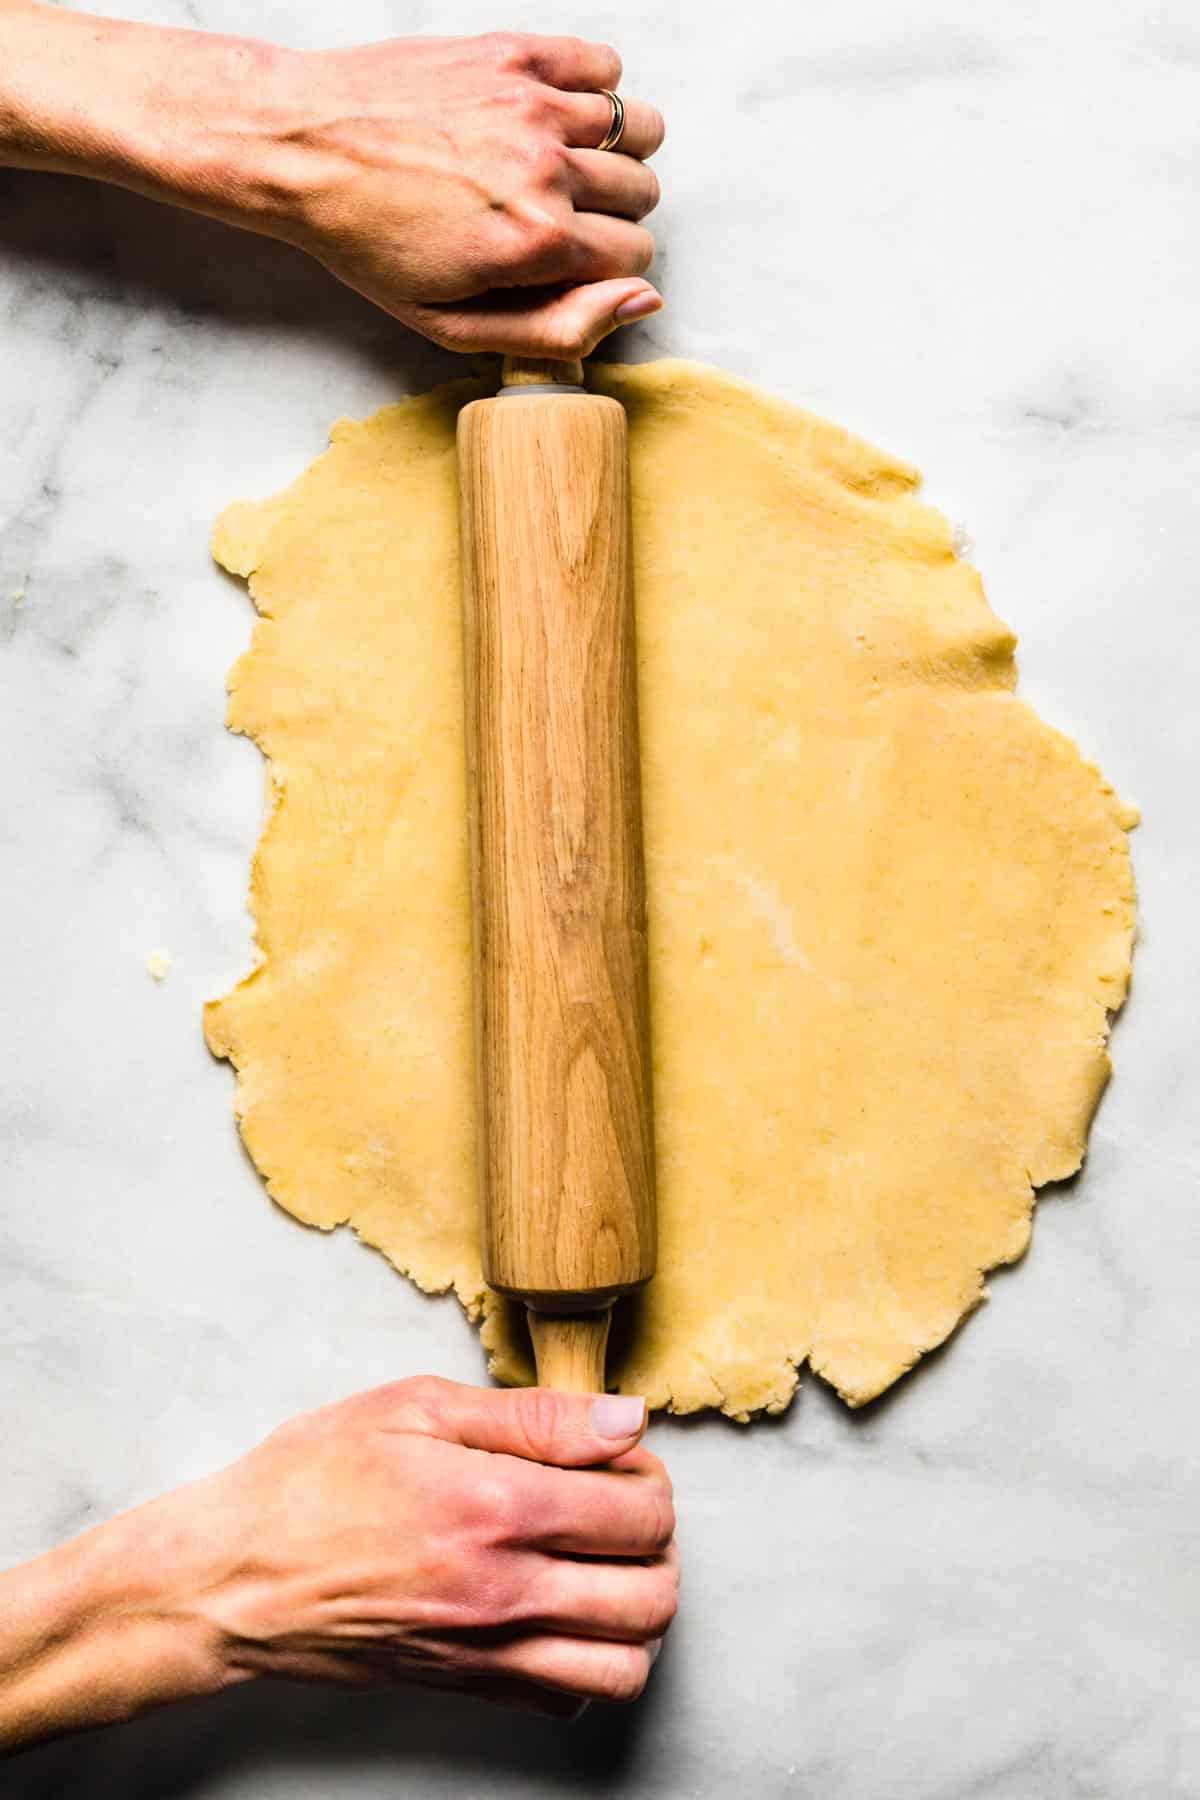
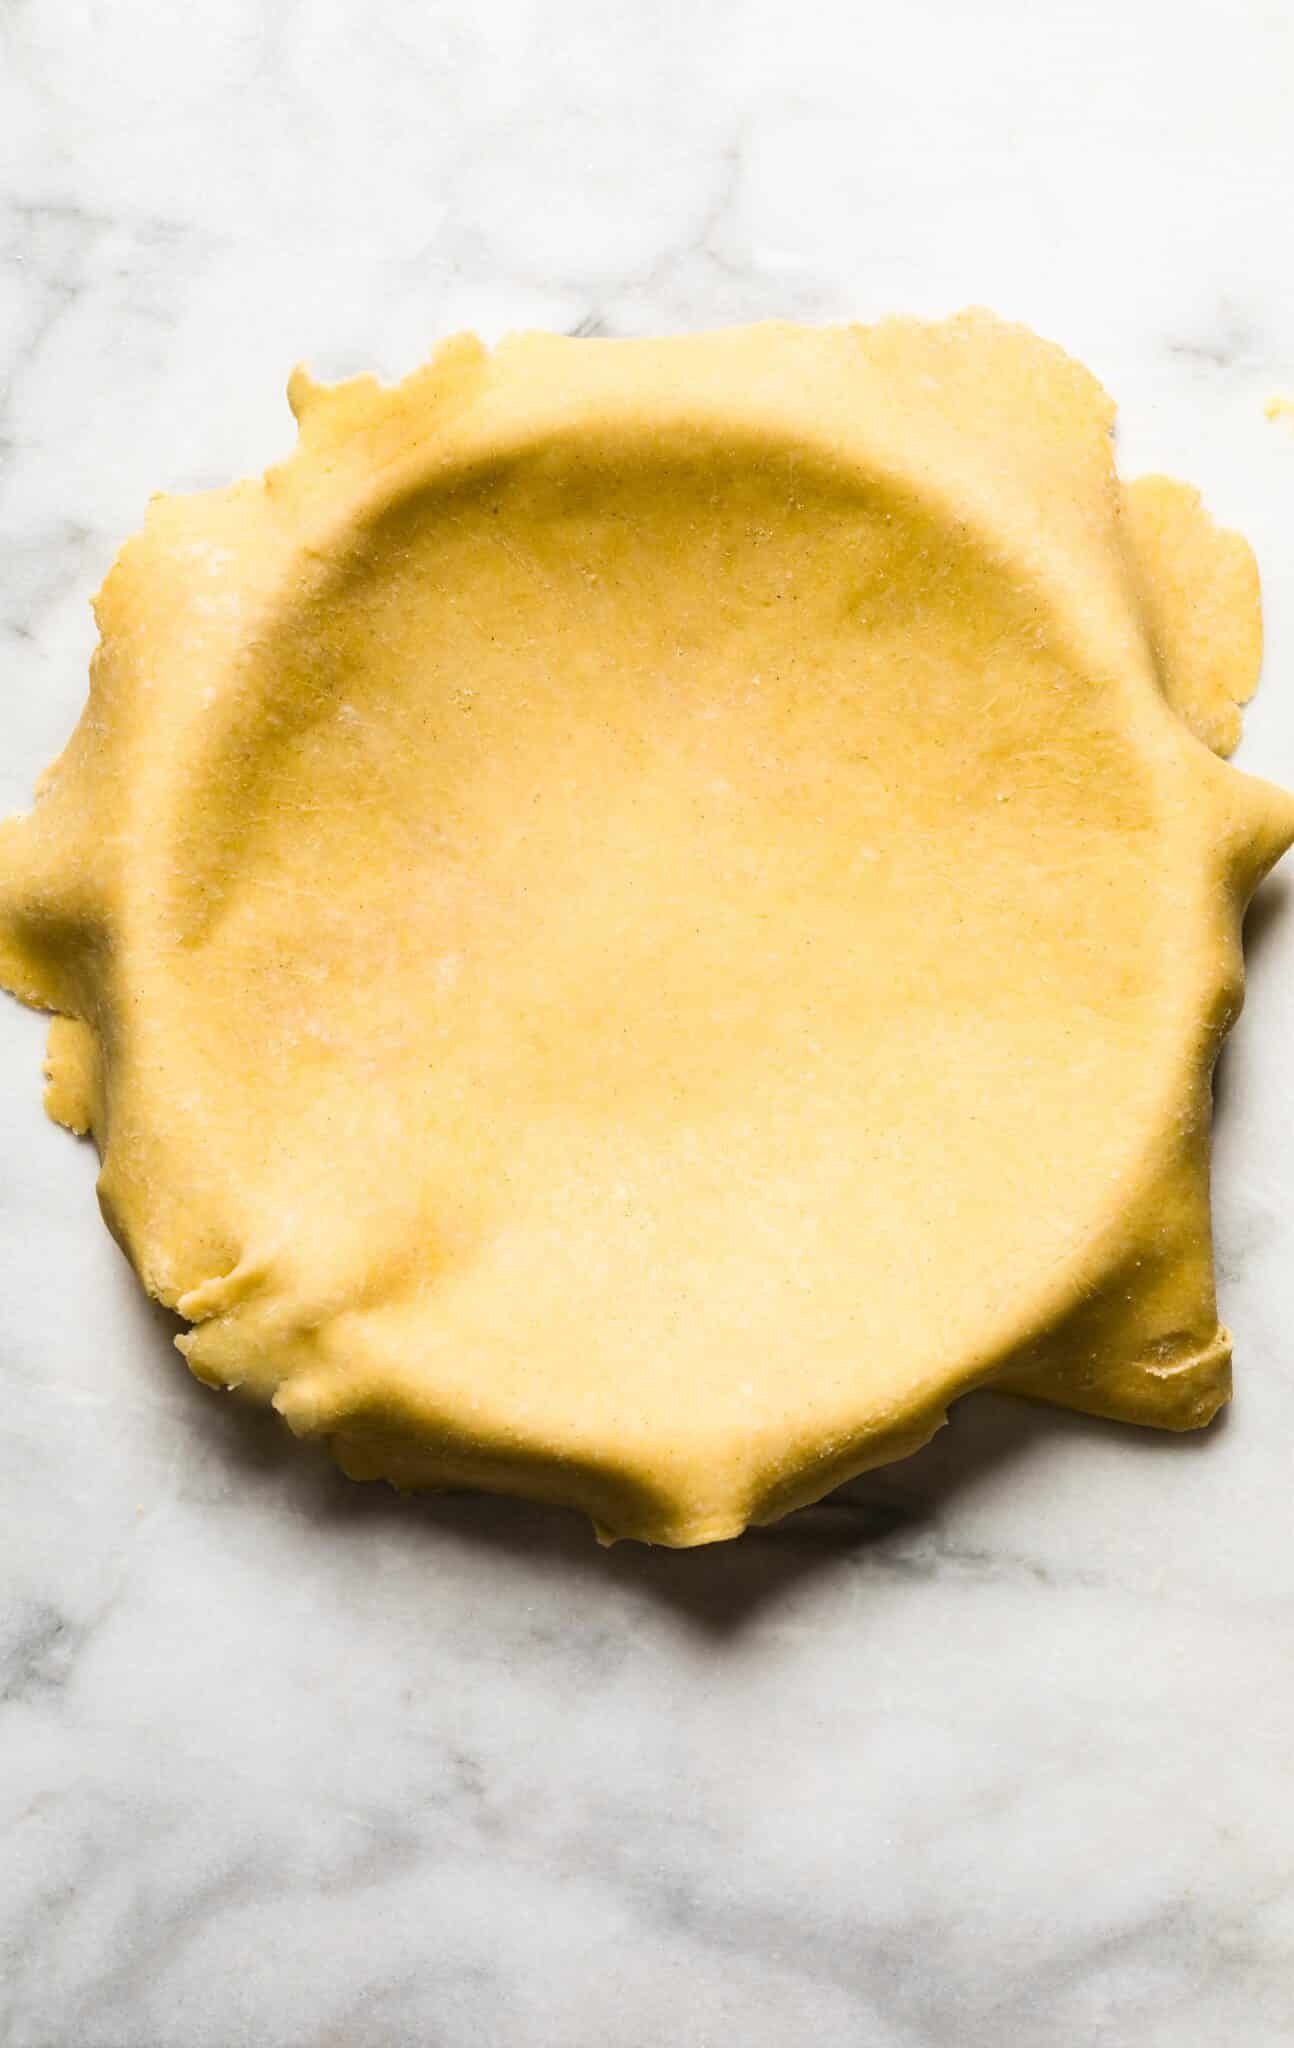
Pro-Tip: If cracks form, wet your fingers with cold water, and use extra dough to patch up the spots, rolling over the cracks with the rolling pin as needed.
- Prepare the pie crust. Transfer the dough to a pie dish, gently rolling the raw pastry around the rolling pin and unfolding it onto the pie pan or shell. Remove the excess dough from the edges, and flute the dough. Proceed with your pie as the instructions for your favorite recipe state!
How to Use Gluten-Free Pie Crust
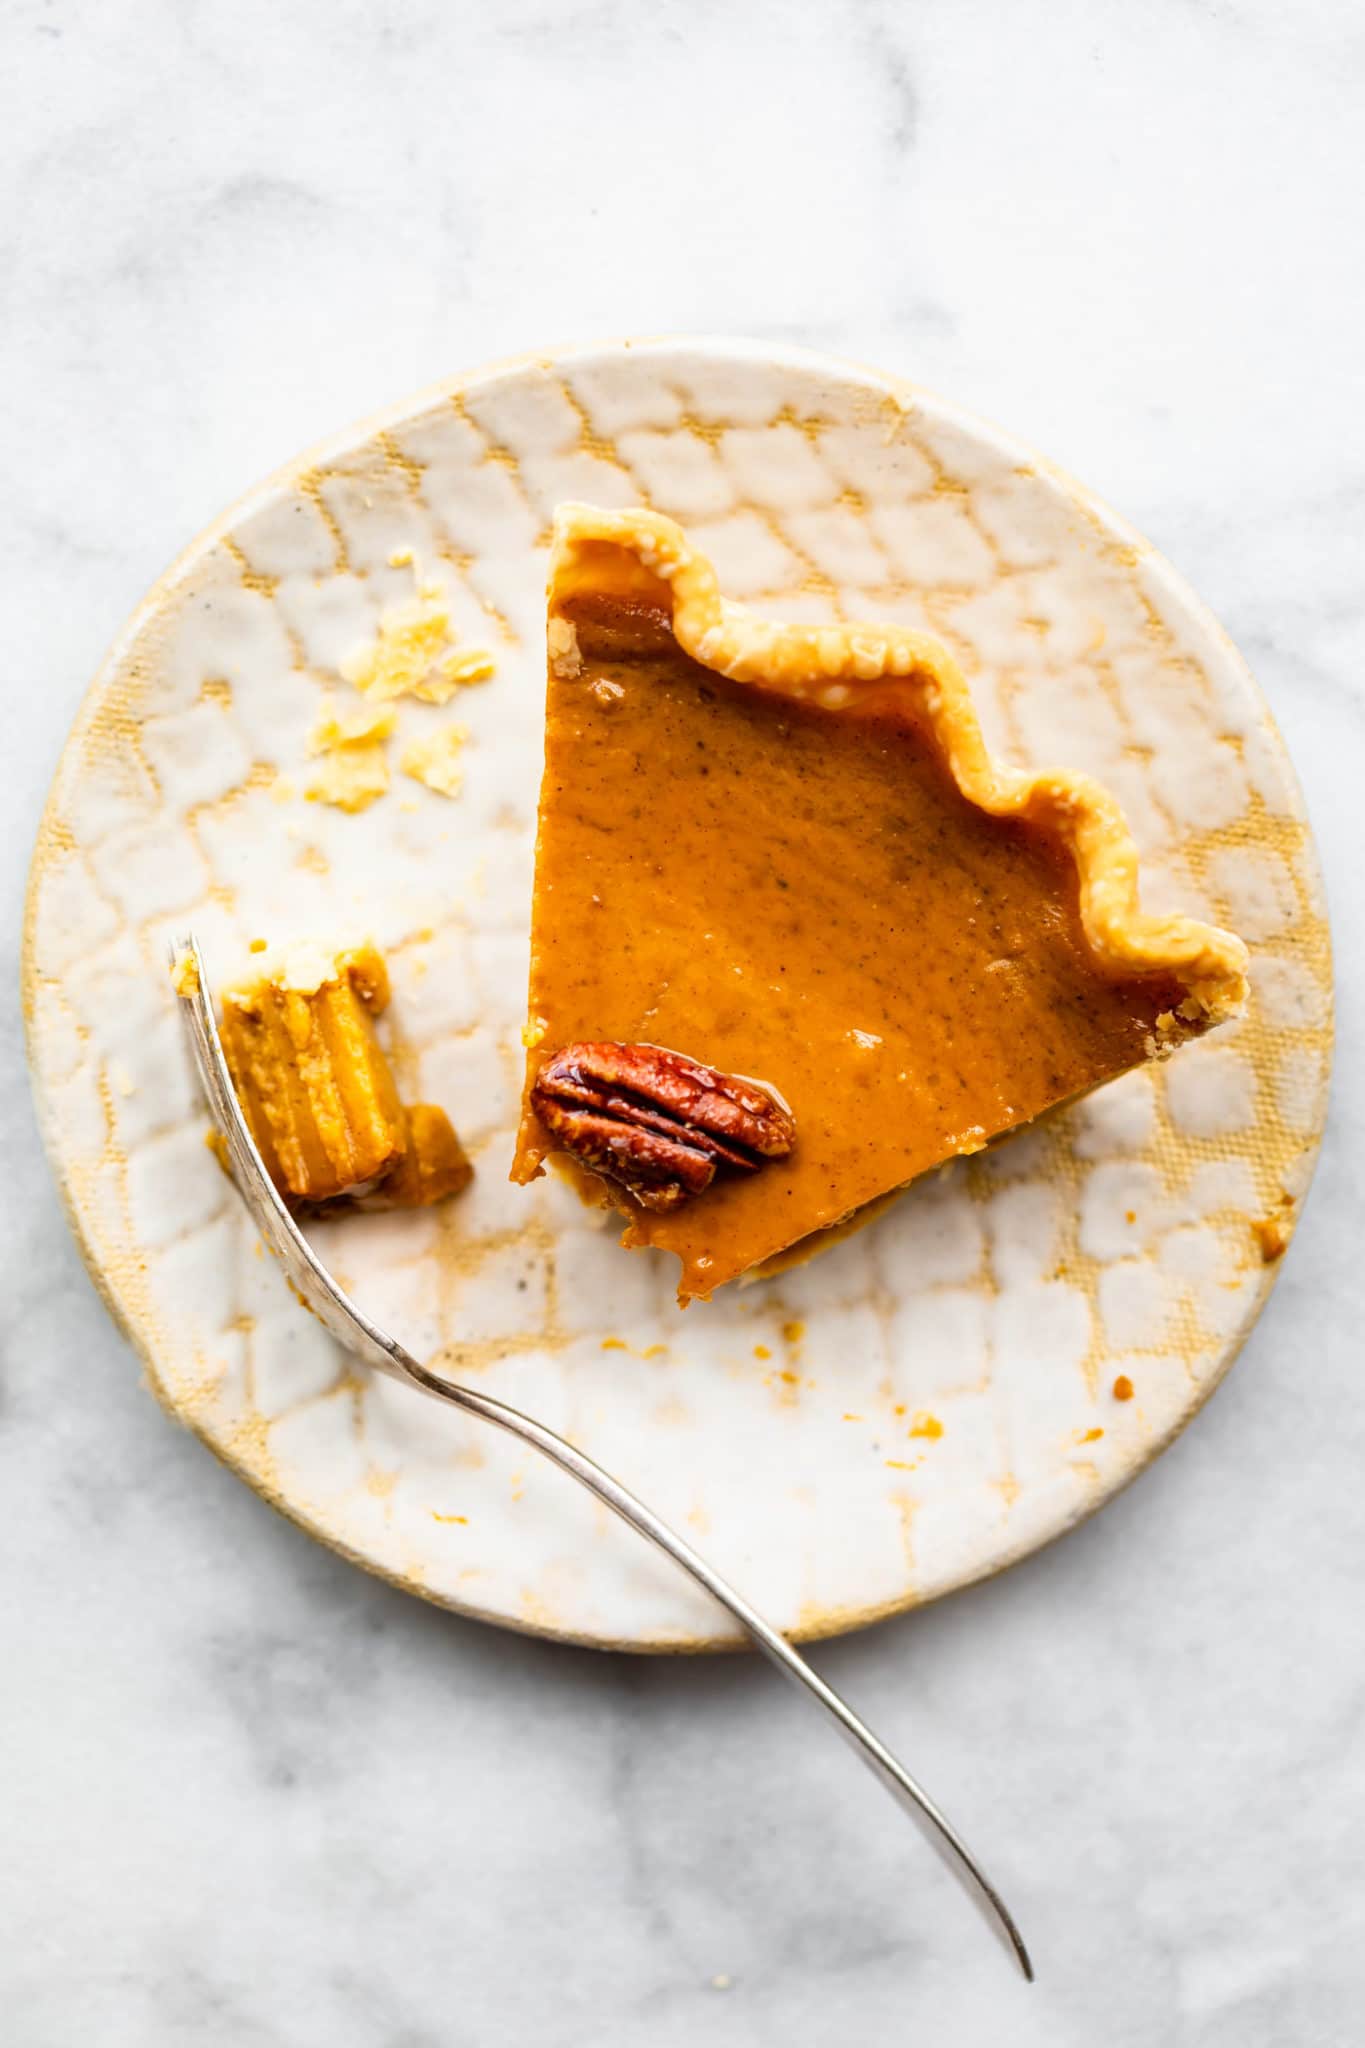
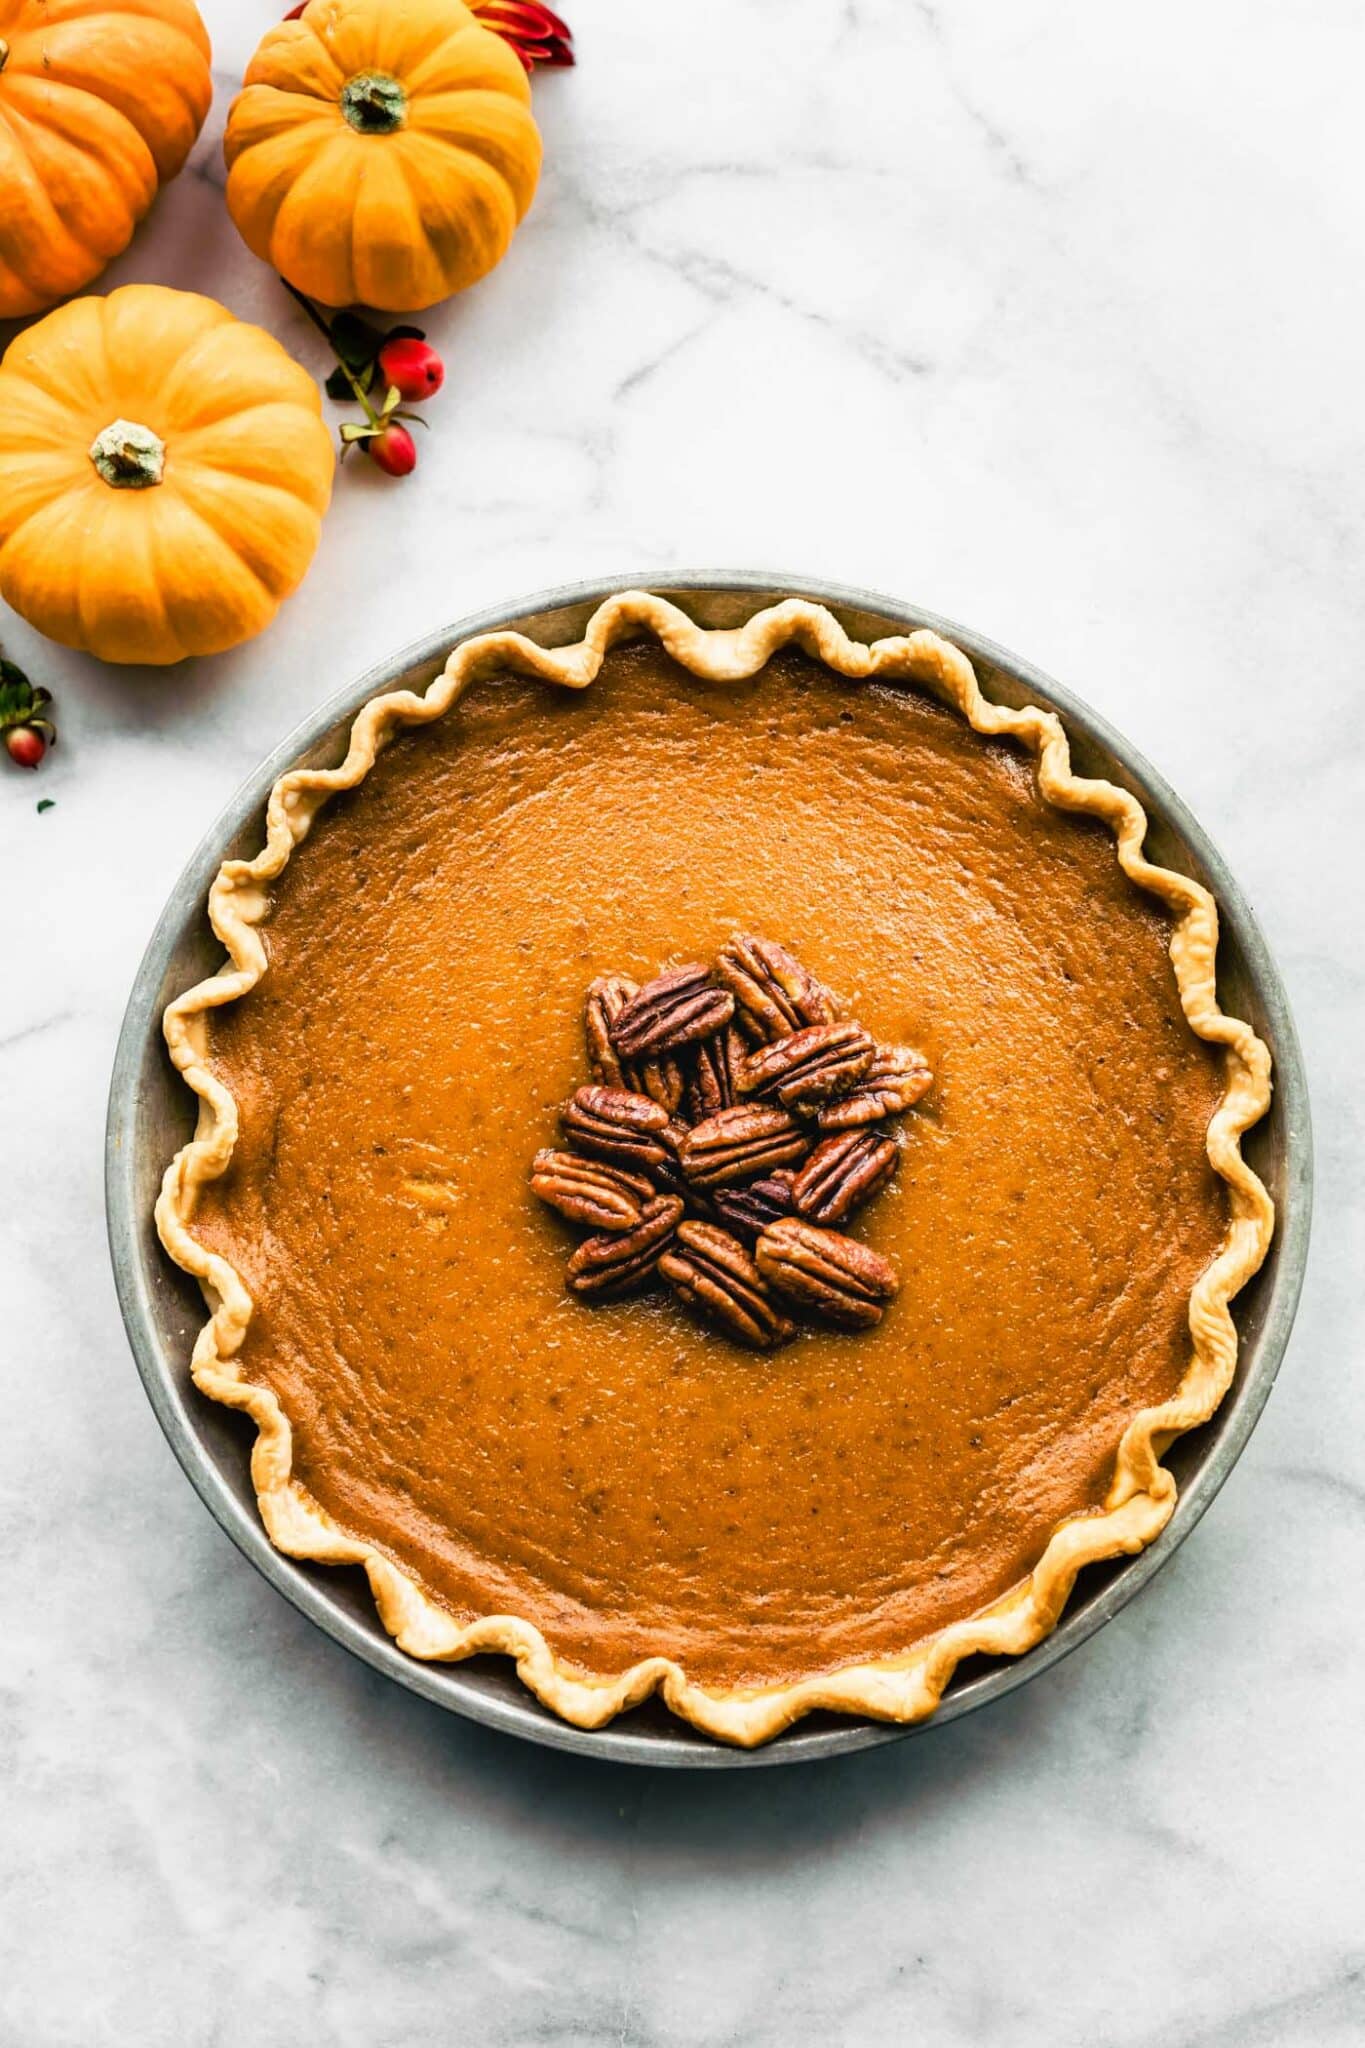
Use this gluten-free pie crust to make all your favorite pie recipes! Pumpkin pie, apple pie, gluten-free pecan pie, hand pies, quiche – you name it! It always tastes great.
Admittedly, we haven’t tested every type of gluten-free pie pastry with this recipe, but we have tested quite a few! So far, it’s worked well with them all and is a great option for staples like gluten-free pies, savory pies, hand pies, and even quiches.

Common Questions
Traditional pie crust is made with wheat flour, meaning it is not gluten-free.
This pie crust tastes exactly like a traditional recipe, featuring a decadent, buttery flavor that pairs perfectly with your favorite pie filling.
There are endless ways to crimp a pie crust, and everyone has their own favorite pie crust crimping method. However, we tend to just use our fingers! To do so, use your thumbs and pointer finger, gently crimping the edges of the dough.
Of course, every recipe will come with different baking instructions. However, in general, you’ll know your pie crust is done baking when it’s golden brown and crisp.
Yes, the dough can be prepared up to two days in advance. Wrap it tightly with plastic wrap, and transfer it to a sealable bag. Then, store it in the fridge to keep it fresh!
Sure! Assemble the ingredients, and roll the crust into a disc. Then, wrap it in plastic wrap, store it in a sealable bag, and keep it in the freezer for up to two to three months. To use, let it thaw in the fridge overnight, bring it to room temperature, and follow the instructions for your favorite pie.
We don’t recommend doubling this recipe. Instead, make two batches to ensure a smooth, workable dough. Doubling the ingredients in a single batch can be tricky if you don’t properly weigh the flours and cause the dough to become too dense!
If time is tight, you can double the recipe—just be extra mindful. Chill the the dough longer and divide into smaller portions before rolling or freezing
But if you’re baking for something important or want the most consistent results, two batches is the safer bet.
We don’t recommend swapping the gluten-free flour blends for stand-alone flour like coconut flour, rice flour, or almond flour as they won’t yield the cohesive, structured, flaky gluten-free pie crust we’re looking to achieve. That said, we have used a 1:1 gluten-free flour with xanthan gum for this recipe. While it works, it does not create a flakey crust.
More of Our Favorite
Gluten-Free Baking Basics

Easy Gluten-Free Pie Crust Recipe
- Total Time: 77 minutes
- Yield: 8 to 10 servings 1x
- Diet: Gluten Free
Description
Learn how to make an easy gluten-free pie crust recipe with a handful of simple ingredients for a homemade option to satisfy all your baking needs! Dairy-free option.
Ingredients
NOTE – If making a custard-filled pie (like pumpkin pie), bake the pie dough first (par bake) before adding filling to allow some of the moisture in the crust to evaporate.
- 1 ½ cups (205-215 grams) gluten-free all-purpose flour or homemade all purpose flour blend (without xanthan gum) *see notes
- ¾ teaspoon xanthan gum
- ½ cup butter (8 Tbsp), partially frozen or very cold, cut into cubes (see notes)
- 3 teaspoons sugar
- ¾ teaspoon kosher salt
- 6 –8 Tablespoons ice water (if you live in a dryer climate, you might need closer to 8 Tablespoons)
Instructions
- Place 1 cup flour into a food processor with the blade attachment. If you don’t have a food processor, see blog post. Sprinkle frozen butter cubes over the flour.
- Cover with the remaining cup flour followed by xanthan gum, sugar, and salt. Pulse in short bouts until butter is broken down into small pieces, about 25 times.
- Drizzle in the ice water. Mix with longer pulses for 10 to 12 seconds. The mixture will turn light yellow in color and the texture will be crumbly. Scrape down the sides with a spatula and pulse again one or two more times. Do not overwork the batter (it should be mealy with bits of butter still visible). If the dough seems too dry to shape into a ball, add 2 Tablespoons more ice water.
- Transfer the mixture to a large bowl or onto a working surface. Shape the dough into a ball (again, do not overwork the batter), flatten slightly into a disc and tightly wrap with plastic wrap. Place the dough in the refrigerator to chill for an hour or overnight (see notes).
- Allow the dough to rest at room temperature for 10 to 15 minutes before rolling.
- To roll the dough, lightly flour the work surface and the rolling pin and sprinkle a little flour on top of the dough. Or roll the dough between two pieces of plastic wrap.
- Start from the center and work out in all directions. If cracks form, wet your fingers with cold water and use extra dough to patch up spots, then roll over the cracks, as needed. Roll until the dough is about ¼ to ⅛ inch thick.
- Transfer to a pie dish by gently rolling the pastry so it wraps around the rolling pin then lay it on top of the pie pan/shell. Remove the excess pie dough and flute the dough. Then proceed with the pie per the recipe’s instructions. See notes for blind baking and parbaking tips.
Notes
Gluten-Free Flour Tips – Each brand of gluten-free all purpose flour will weigh differently per ¼ cup. The range that works well is between 30-34 grams per ¼ cup. If the gluten-free flour has xanthan gum already in it (such as a 1:1 blend), omit the xanthan gum in the recipe. The texture will not be as flaky, but a little more doughy. Regardless, a 1:1 flour blend “should” work.
Prep Tips – For partially frozen butter, place cold diced butter in the freezer for 10 minutes before using. This is key to a flaky crust. See blog post for tips if you don’t have a food processor.
Dairy-free Butter Substitute- Miyokos plant based butter or Earth Balance soy free butter are great options — their high fat-to-water ratio is similar to dairy butter, which helps create perfectly flaky crusts and better baking results.
Storage Tips – Once the dough is prepared, wrap in plastic wrap and place the wrapped dough pucks in the fridge for up to 3 days. For long term storage, place the wrapped pucks in a freezer-safe bag and store in the freezer for up to 3 months. Thaw in the fridge overnight before using in the pie recipe.
Baking Tips – Blind-baking a crust means the crusts are filled with fillings that don’t need to be baked (no bake pies, frozen pies, etc); par-baking means the crusts are partially baked and used for fillings that need to be cooked in the oven, such as pumpkin pie, custard pies, etc.
To blind bake the pie crust before adding a filling, freeze the pie crust in the pie pan for 20 to 30 minutes before baking. Preheat the oven to 375 F. Place 2 pieces of parchment paper or plastic wrap over the pie crust then fill with pie weights. In a small bowl, whisk together 1 egg or egg yolk with 1 Tablespoon water or milk and set aside. Bake for 18-20 minutes then remove from the oven. Carefully remove the pie weights and parchment paper. Prick the bottom of the crust with a fork (don’t pierce through). Brush the base and sides of the crust with the egg wash (not the fluted edge). Return the pie crust to the oven to bake for 5 more minutes or until the crust is golden brown. Cool completely before filling.
To parbake (for custard-like pies such as pumpkin pies and quiches), bake the crust (with parchment paper and pie weights) AT 375 F for 10 minutes. Carefully remove the pie weights and parchment paper. Prick the bottom of the crust with a fork. Brush the base and sides of the crust with the egg wash (1 egg or egg yolk whisked with 1 Tablespoon water or milk), then return the pie crust to the oven for 7-8 minutes or until the bottom is golden brown. Par-baking tips. When you are ready use the par-baked pie shell, add the filling and cover the edges of the crust with aluminum foil or a pie shield half way through baking to prevent over browning.
Glass and ceramic pie dishes heat up slower but more evenly than metal, adjust baking times as needed.
- Prep Time: 10 minutes
- Chill Time: 1 to 12 hours
- Cook Time: 7 to 16 minutes
- Category: dessert
- Method: oven
- Cuisine: American
Nutrition
- Serving Size: 1 serving
- Calories: 176
- Sugar: 1.4 g
- Sodium: 104.7 mg
- Fat: 10.6 g
- Saturated Fat: 6.4 g
- Carbohydrates: 18.2 g
- Fiber: 2.7 g
- Protein: 2.1 g
- Cholesterol: 27.1 mg


Rate & Comment